
"Summer time and the livins easy!" Summer is just around the corner, and what better feeling is there than quenching your thirst after a day in the sun? Set that drink down on the most adorable, easy-to-make coasters. Make and bring these customizable coasters to your BBQs this summer as gifts for the host. These would make the cutest gifts! Coasters also serve to add some pizzazz to your tablescapes, all while being super practical. They cushion your cups or dishes while you’re using them and they protect any table and counter surface from scratches, minor spills, or condensation.
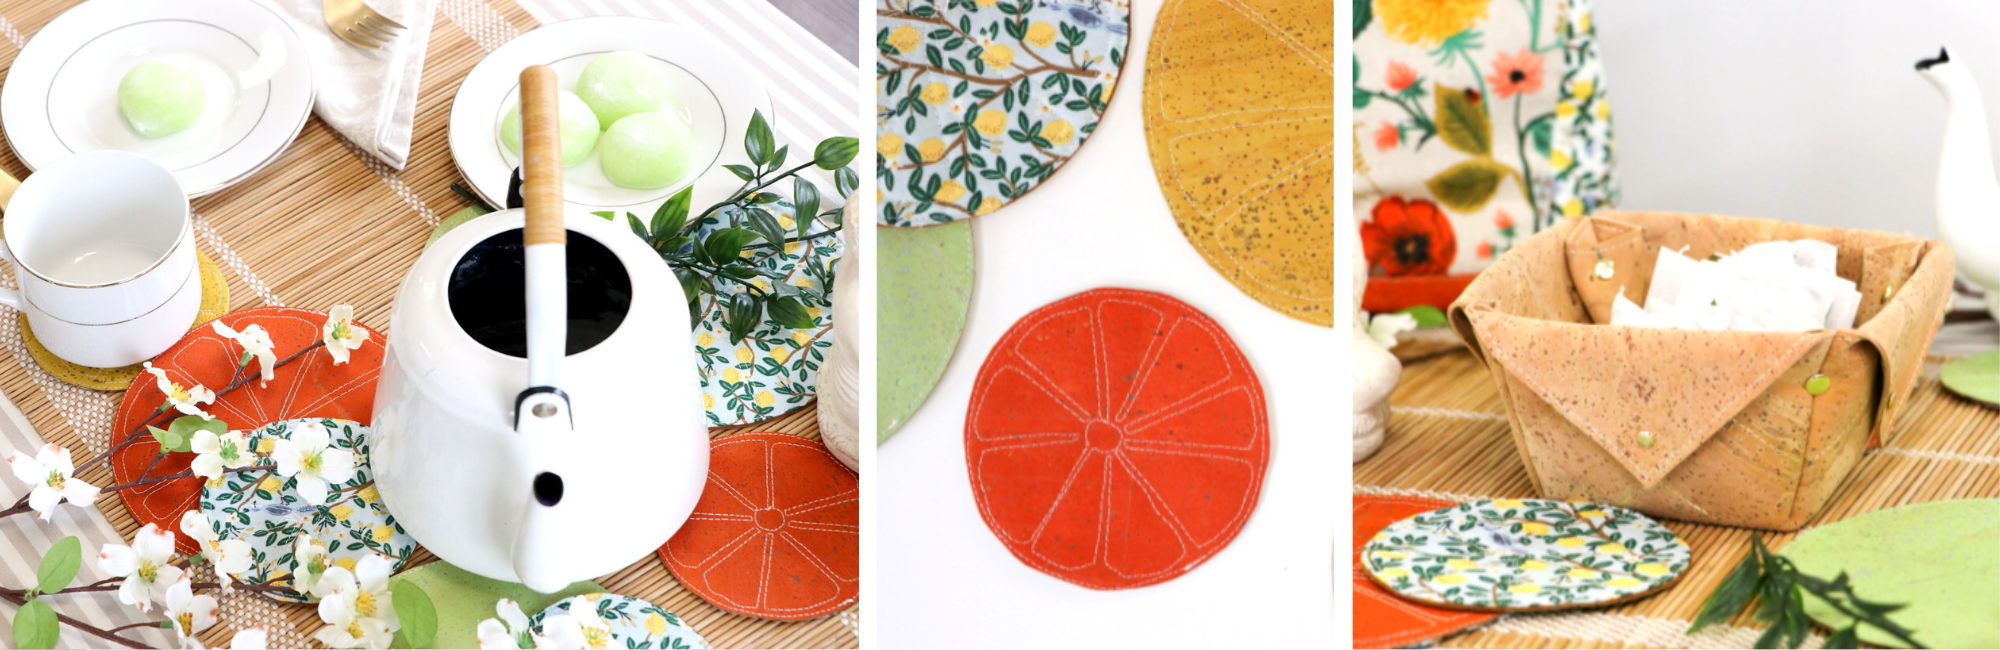
A single fabric can set a whole tablescape into being: the lemon tree print used for this tutorial reminds us of refreshing citrus, and inspired Jess’s color palette choices. Sweet round coasters mimic the delicious slices of lemons, oranges, and limes. Get creative and turn a solid fabric into something extraordinary–add machine or hand embroidery, applique, stenciled or painted designs. You can make each coaster one-of-kind! They’re a fast sew too, don’t stop at just a few!
Be sure to watch Jess’s tablescaping using easy citrus coasters here on our YouTube Channel.
The finished size of these coasters can be either 4 inches or 6 inches in diameter. Let's get started, so you can add a bit of freshness to your table or tea party!
MATERIALS AND SUPPLIES
- Main Fabric - quilt cotton, chambray, or linen for coasters 42" wide - 7" (for two coasters in each size)
- Accent Fabric - cork fabric, faux leather, or fabric that doesn’t fray for coasters 25" wide - 7" (for two coasters in each size)
- Interfacing - lightweight, fusible woven interfacing, such as Bosal Fashion Fuse 19" wide - 10" (for two coasters in each size)
- Helpful Notions -40 wt. polyester thread, small scissor, turning tool, press cloth, basting spray, tape, or glue, removable pen or chalk, Curved Corner Cutter (#CGRCCC)
CUTTING INSTRUCTIONS (WIDTH x HEIGHT) Measure and cut the following pieces:
- Main Fabric
- Cut (2) 4-1/2" squares
- Cut (2) 6-1/2" squares
- Accent Fabric
- Cut (2) 4-1/2" squares
- Cut (2) 6-1/2" squares
- Interfacing
- Cut (2) 4-1/2" squares
- Cut (2) 6-1/2" squares
SEWING INSTRUCTIONS
1. Fold the interfacing and fabric squares into quarters, aligning raw edges. Place the Curved Corner Cutter on top, aligning the template edges to the edges of the folding fabric. Use the 3” radius for the larger squares and the 2” radius for the smaller squares. Cut curves and unfold fabric and interfacing pieces (see photos below).

2. With Fusible Side Up, place one interfacing circle on the Right Side of one fabric circle, aligning curved edges (See photos below Step 5).
3. Sew around the raw edges with 1/4" seam allowance (See photos below Step 5). *Note: Try reducing stitch length to 1.5 or 2.0mm for a smoother stitched curve.

6. Roll the seam with your fingers so the interfacing doesn’t show behind the Right Side of fabric. Press the interfacing to the fabric, using a press cloth (See photo below Step 7).
7. Place the fabric circle on the cork square, Wrong Sides Together. Use basting tape or spray to hold the layers together (See photo below).

8. Topstitch, following the fabric seam edge with 1/8" allowance. Optional: Add citrus fruit segment topstitching- scroll for clearer pictures of the topstitching (See photo below Step 9).
9. Carefully trim the cork, following the edge of the fabric circle (See photo below).

MORE INSPIRATION...
A set of twelve citrus coasters fit neatly inside our small Billie Basket Pattern! We used Surface Natural Cork Fabric to make the basket appear to be a crate for fruit. Yeah... we thought we were clever!
Enjoy and have a great making day!


Leave a comment