
We’ve all been there…The unfinished projects, disorganized notions, stacks and stacks of fabric scattered around the room...patterns in a messy pile that you forgot even you had…it’s tough to feel creative, and motivated to work on the projects when you’re surrounded by a mess. Where do we even begin?
WELL LET US SHOW YOU!
We're going to provide you with great tips for keeping your sewing or craft space organized, by using things you likely already have at home! We’re also going to “freshen” the space up a bit, by adding some new “life” to the room! You’ll understand my puns once we start decorating!
Watch the full tutorial here!
1. Decide What to Keep, Donate, & Throw Away!
First thing's first - we’re going to take everything out of the room and put it all in one big pile. Then, sort the large pile into three smaller piles: one to keep, one to donate, and one to throw away. This technique will give you a perspective on how much you have, and will force you to go through everything at once. Decide on what you really don’t need, or realistically don’t plan to use. It’ll be tough, but it will feel like a weight has been lifted after purging your stash. Don’t forget to sweep and clean before we bring anything back in!

2. Organize!
Next, let’s get started on organizing your fabrics! I used to store my fabrics in containers, and would forget about what I had. Now, I file my fabric in a filing cabinet. Take a hanging file folder and cut across to create two fabric hangers. Take a piece of fabric and arrange it so the selvages are aligned and the folded edge is at the top. Then, fold it in half, matching the top fold with the selvages. Depending on the yardage, you may have to fold the fabric in half again, then fold it over the fabric hanger. I file my fabrics in color order, and also by type such as novelty, holiday, batik, and canvas. If you don’t have a filing cabinet, usually you can find them for cheap at garage sales or thrift stores.

For cork fabric, faux leather, or other specialty fabrics, I roll those and secure them with a rubber band. Then I store in a drawer organizer to keep them protected from sunlight and dust. I store mine by solids, prints, and type. For fabrics less than 1/4 yard, I do store those in a container so my scraps are all together. I sort my cork and faux leather scraps into a plastic bag to keep them separate from my cotton and canvas scraps.

Next let’s tackle your pattern stash! Instead of a disorganized basket or box full of patterns, store them in binders. Insert your printed PDF or store bought patterns into separate sheet protectors. The sheet protectors will prevent dust and water from damaging your patterns. Then, sort into binders depending on the type, designer, or in alphabetical order.

Instead of storing thread in a tangled up mess in a bag or container, I use a thread rack. It’s easy to keep bobbins organized with the matching spool by placing the bobbin on the rack first, then the spool on top. I suggest sorting your threads by type, color, or application.

Next let’s organize that mess of notions! I love using drawers to organize the little things so they’re easy to access, but out of sight, which will make the space look cleaner. Group your notions by type or application, such as all of your glues and tapes together, needles, marking utensils, and so on. Then, grab some plastic bins from the dollar store, or unused containers from around your house, and add the notions to individual bins. Then place the organized bins into the drawer. Make sure to clearly label the front of the drawer with what’s inside.

To organize your presser feet, I recommend using a clear plastic compartment box. This will keep your feet protected and sorted.

Let's get to the zippers, shall we? I store my zippers in a drawer. I roll them around my hand and sort by tape color with the coil color towards the top so it’s easy to see what I have. This is just what I do, to keep them condensed into a smaller space, but if you have another method for organizing zippers, I’d love to hear what you do if you’d like to drop a comment below. Then, I recycle ziploc bags to separate by zipper pulls by color.

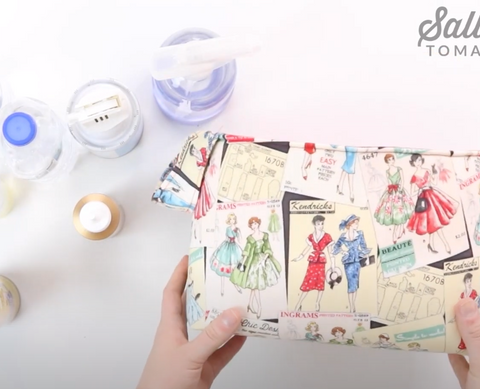
My last storage idea is for all of your spray bottles and spray adhesives. Find a larger basket strong enough to hold your bottles. I use this fabric basket my mom made me. I love the vintage print she used and I like to have it on display so it doubles as a piece of décor in my sewing area. Simply add your bottles to the basket, and we’re ready to start decorating!
3. Decorate!
I love bringing plants into a space for texture and a refreshing mood, even if they are artificial. You could certainly paint an accent wall or add fun wallpaper, but I found these artificial boxwood panels I’m going to accent one wall with. They interlock together and are quickly hung with command hooks, or stapled to the wall.

I used a manual staple gun to install my plant wall, and the room was completely transformed in under an hour! If you like to garden or spend time outdoors, adding some greenery into your crafting space may be just what you need for some inspiration and tranquility. It gives you a way to connect with nature with our built environment, and creates a calm, peaceful space for you to step away to!
So let’s start bringing everything back into the room. Add your largest pieces of furniture first, and your sewing machine so it’s safe while we move everything else back in.

Keep your drawer organizer close to your table for easy access. I also store my handy zipper jig in my zipper drawer to help me when I’m ready to make a zipper. Again, make sure each drawer is clearly labeled.
If you have a small space like me, or prefer an area close to your machine for ironing, I recommend using the top of your drawer organizer as a small pressing station. A wool pressing mat provides a large pressing area, and a mini pressing iron is just the right size.

Keep your basket of spray bottles next to the pressing station, and store your mat next to your drawer organizer and your iron inside the basket when not in use.

Quotes are always a huge motivation for me, so you make like to add a framed quote or some artwork for inspiration. Then, place the thread rack near your machine for easy access and a pop of color.

I repurposed these bookends to use with my pattern binders. Then added some more greenery, and even more greenery…

SEW...are you ready for the big reveal?! TA-DA!

I’ve truly enjoyed sharing this transformation with you. I think you will find that you’ll accomplish more when your space is organized and you love the way it looks.
Set the mood for how you want to feel while sewing and crafting. Perhaps it’s an outdoor garden, like me, and you could even play some calming music or nature sounds. Or maybe it’s bold with loud patterns and bright colors. Or a vintage look with worn furnitured and collected trinkets. Whatever your vision is, we can’t wait to see your before and after photos! If you decide to reorganize your sewing space, share photos using: #sallietomatomakeover and #inspiredbysallietomato so we can celebrate your makeover with you!
I wish you all my best, and I hope you’ll stick around for some more inspiration! Don’t forget to subscribe to our YouTube Channel when you click the video above.
See you next time!


Leave a comment